Unscrew all bolts and nuts, then you can take this item, it can go bad due to small stresses, "hover", in which case it can be removed by weak jerking, shaking machine.
Now you need to unscrew the pad itself, it holds three large nuts screwed to the body. Unscrew the three screws and take out the pillow.
We climb down, unscrew the crankshaft pulley (he is on the four bolts screwed to the gear, which is inside the dust cover) and remove it.
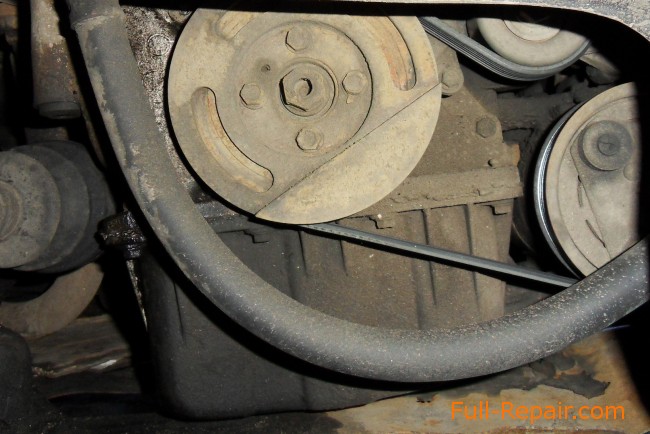
Along with it comes off and the service belt. Thereafter untwist 5 bolts, which hold the lower dust cover (visible in the diagram below), which covers the crankshaft gear.
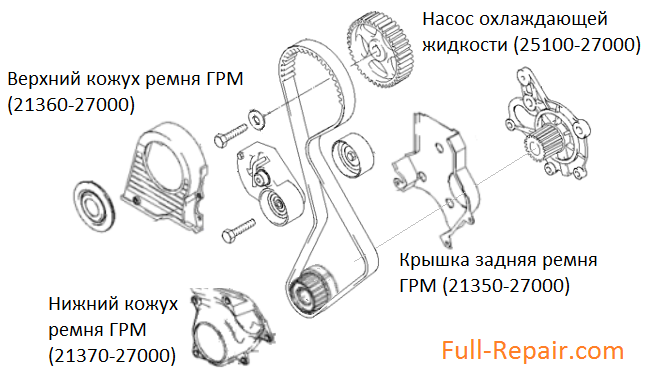
Remove anything that may interfere with the removal of parts, which are hidden behind the rollers. In my case-it's oil tube that goes from the oil pump to the vacuum. Be careful not to lose the copper gasket (mounting oil supplying pipe circled in green).
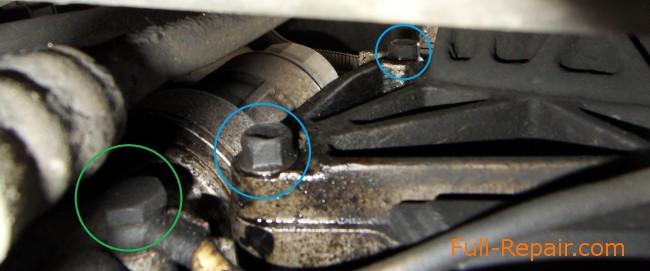
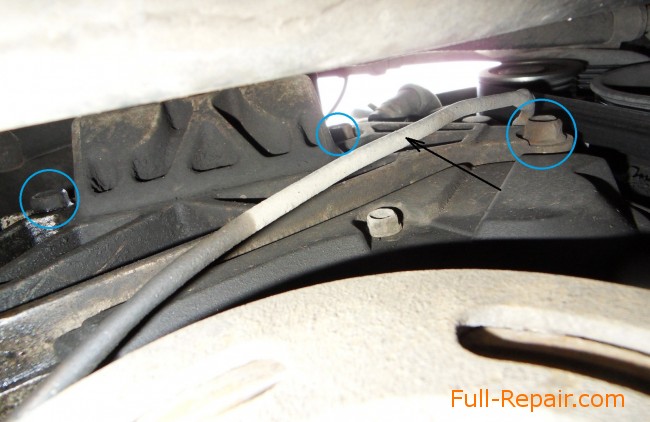
Remove the four large screws (they are in the photo above are outlined in blue), support of the engine can be pulled out from the top. After removing the engine side of the part will look like in the photo below, but in the back of the car:
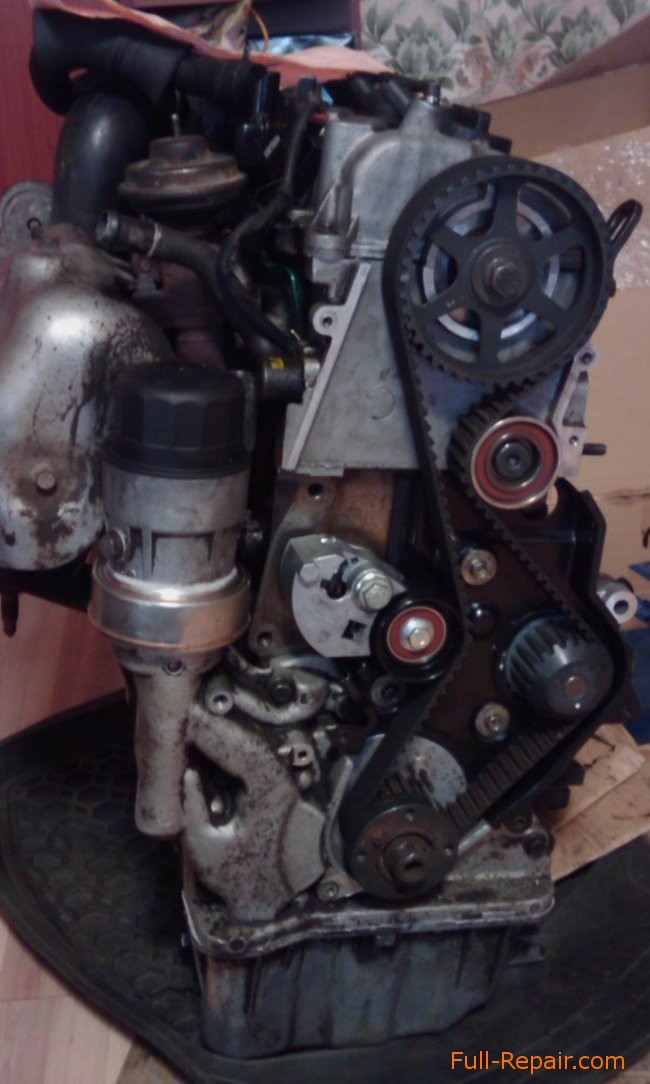
The picture above is visible rear belt guard, he closes the coolant pump.
expose the label before removing the replaceable parts
Crank the engine at a position where the mark on the upper sprocket is opposite the plane of the cylinder head, crankshaft, respectively, on the same label should be aligned.
Take the key "to 15" and unscrew the tension pulley, then Allen bypass, remove them and remove the belt.
If you want ... in general, there will be a more convenient opportunity to change the pump, which also turns off this belt, we can only drain the coolant, unscrew the old and screw on the new one. True it closes another protective cover, which is held by three bolts, but it is not difficult to remove.
Labels we put up, fasten the two new clips, dress belt, make sure that the labels are not moved out. Then the "down" tension roller (you need to pull the locking rod bent, it can be seen in the photos below), he presses the belt, crank the engine, make sure that the labels are not moved out. If you moved out, the tension roller can be returned to its original position, taking his head on it available for Allen (pictured it circled in black), and to fix the same core, and then fix the belt.
When labels are displayed correctly and tensioned belt to tighten hex bolt (circled in red), which is inside the tensioner, it will fix its position and will not allow the belt "jumping" between the teeth.
New timing belt (24312-27000) and the rollers are installed. But there is one legend, probably many have heard that you can not buy tensioner pulley and take the two-pass and change only the tensioner pulley. Is this true? Well, look at the tensioner roller (24410-27000) and bypass (24810-27000), which is twice deshevvle:
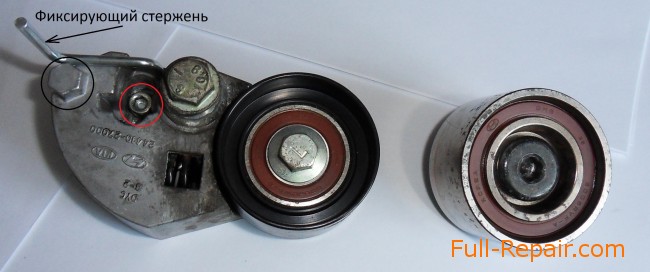
It can be seen with the naked eye, they are different. In bypass large bearing in the tensioner pulley a little.
Let's try to loosen the tensioner pulley (where non-standard thread).
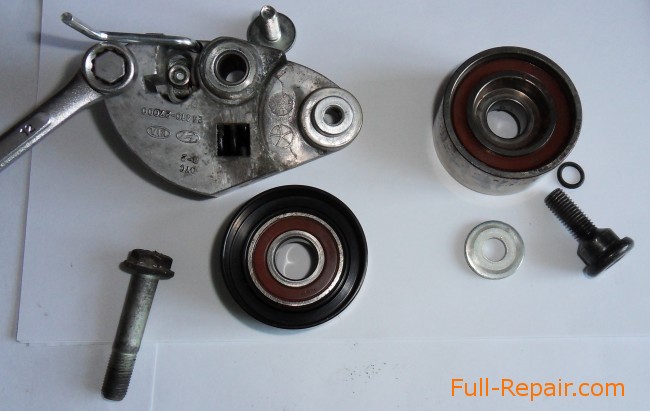
Mounting holes look the same, measured the caliper-the same.
Will put on the tensioner pulley. Perfect, screw it.
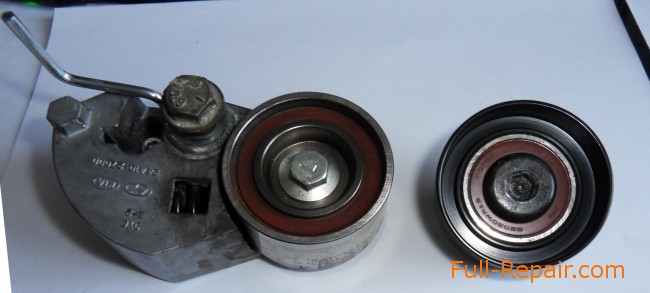
As a result, the bypass is perfectly into place tensioner. The next time I buy a two-pass, in addition to a lot more confidence in the bearing, it looks safer than the little that was originally installed.
Assemble in the reverse order. I'm having difficulty getting dressed belt service. I have it installed on all of the rollers and throw a part on the crankshaft pulley, then held the belt and turning the crank, the belt is put on, it did not work the first time. How will the time-took a photo with a little parsing. When the camera was not changed and the not to be photographed. If that is not clearly explained-ask!
Cars, which use the same parts belt:
- HYUNDAI ACCENT [AW]
- HYUNDAI ACCENT [BA]
- HYUNDAI ACCENT [BG]
- HYUNDAI ACCENT [LC]
- HYUNDAI ELANTRA [CA]
- HYUNDAI ELANTRA [CG]
- HYUNDAI GETZ [BJ]
- HYUNDAI MATRIX [BE]
- HYUNDAI SANTA FE [BB]
- HYUNDAI TRAJET [EC]
- HYUNDAI TRAJET [FO]
- HYUNDAI TUCSON [BH]
- KIA CARENS [FJ]
- KIA CERATO [CD]
Cars, which used the same engine (1.5 CRDI D3EA, 3 cylinder):
- HYUNDAI Accent
- HYUNDAI Getz
- HYUNDAI Matrix
Cars, which used the same engine (2.0 CRDI D4EA, 4 cylinders)
- HYUNDAI SANTA FE
- HYUNDAI TRAJET
- HYUNDAI TUCSON
- KIA CERATO
- KIA SPORTAGE
 Full-Repair.com
Comments:
18.12.2017 at 01:12 Samuel said:
Hi, I would like to get some form of workshop manual for this engine. I have a 1.5Crdi myself and need to do the timing belt. I need the marks of the engine as well as torque settings for all the bolts which have to be dismantled. Would you be able to help?
18.12.2017 at 01:12 Samuel said:
Hi, I would like to get some form of workshop manual for this engine. I have a 1.5Crdi myself and need to do the timing belt. I need the marks of the engine as well as torque settings for all the bolts which have to be dismantled. Would you be able to help?